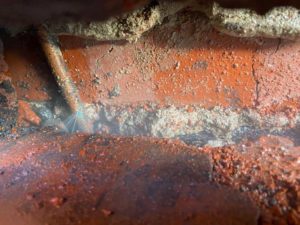
Sure signs of water leakage include mold and moisture patterns on the walls. You can also sense increased water and humid content in the room. Leaks need to be fixed immediately, or they will spread in between rooms. This will make identifying the source difficult but also increase the costs to repair.
Precaution includes assessing the water lines first. Do not drill into walls without any plan, or you might end up damaging the correct water pipe or the main water supply. Instead of uprooting the entire pipe system, strip down the walls to identify the leak. This method is not as costly and is the safest option in the given scenario.
Water pipe leak location
Preparing the premises
The first step is to prepare the walls and water lines. Begin with turning off the main water valve at your home or office building. Turn off all devices and appliances that require water, too, such as dishwashers and showers. Communicate to everyone that the water has been turned off until the problem is fixed.
Marking the pipes
With the help of a stud finder, identify the metal behind the wall to understand water leak detector in pipes. When you have detected pipes, use the stud finder to identify the pipe patterns and mark them with tape.
After doing so, walk outside the house and search for obvious exiting ends of the water pipes. Take pictures of these so you can compare them to the pipes inside. This will help in identifying pipe patterns.
Measuring moisture
If you are still unsure where the leak is coming from, another helpful tool you can use is called the moisture meter. This tool does not break the bank and measures moisture correctly. Scan the wall to identify the source leak.
Piercing the wall
After correctly identifying the source leak, mark the surrounding area of the wall to be taken down. Look for electrical wires and metal fixtures inside the marked area. Begin knifing the area you have taped, and then use a drywall saw to drill a hole.
Fixing the water damage
Once you have drilled successfully, use a torch to pierce the hole. Assess water damage thoroughly and widen the hole if necessary. Chances are, if you have followed the guidelines correctly, the water leak is present in the area you have marked.
After you have successfully identified the water leak, follow it to the source. If it is a minor leak, you can fix it yourself. Homeowners can use joint compound tools to fix the leaking joints. If the leak continues after that, a renovation is advised. It is strongly suggested a stable repair must be arranged. The renovation is always the resort since it does not come cheap.

